Quick Start Example
Welcome to the aifare AI Development Cloud Platform! This guide will help you get started quickly, from creating an instance to beginning AI development.
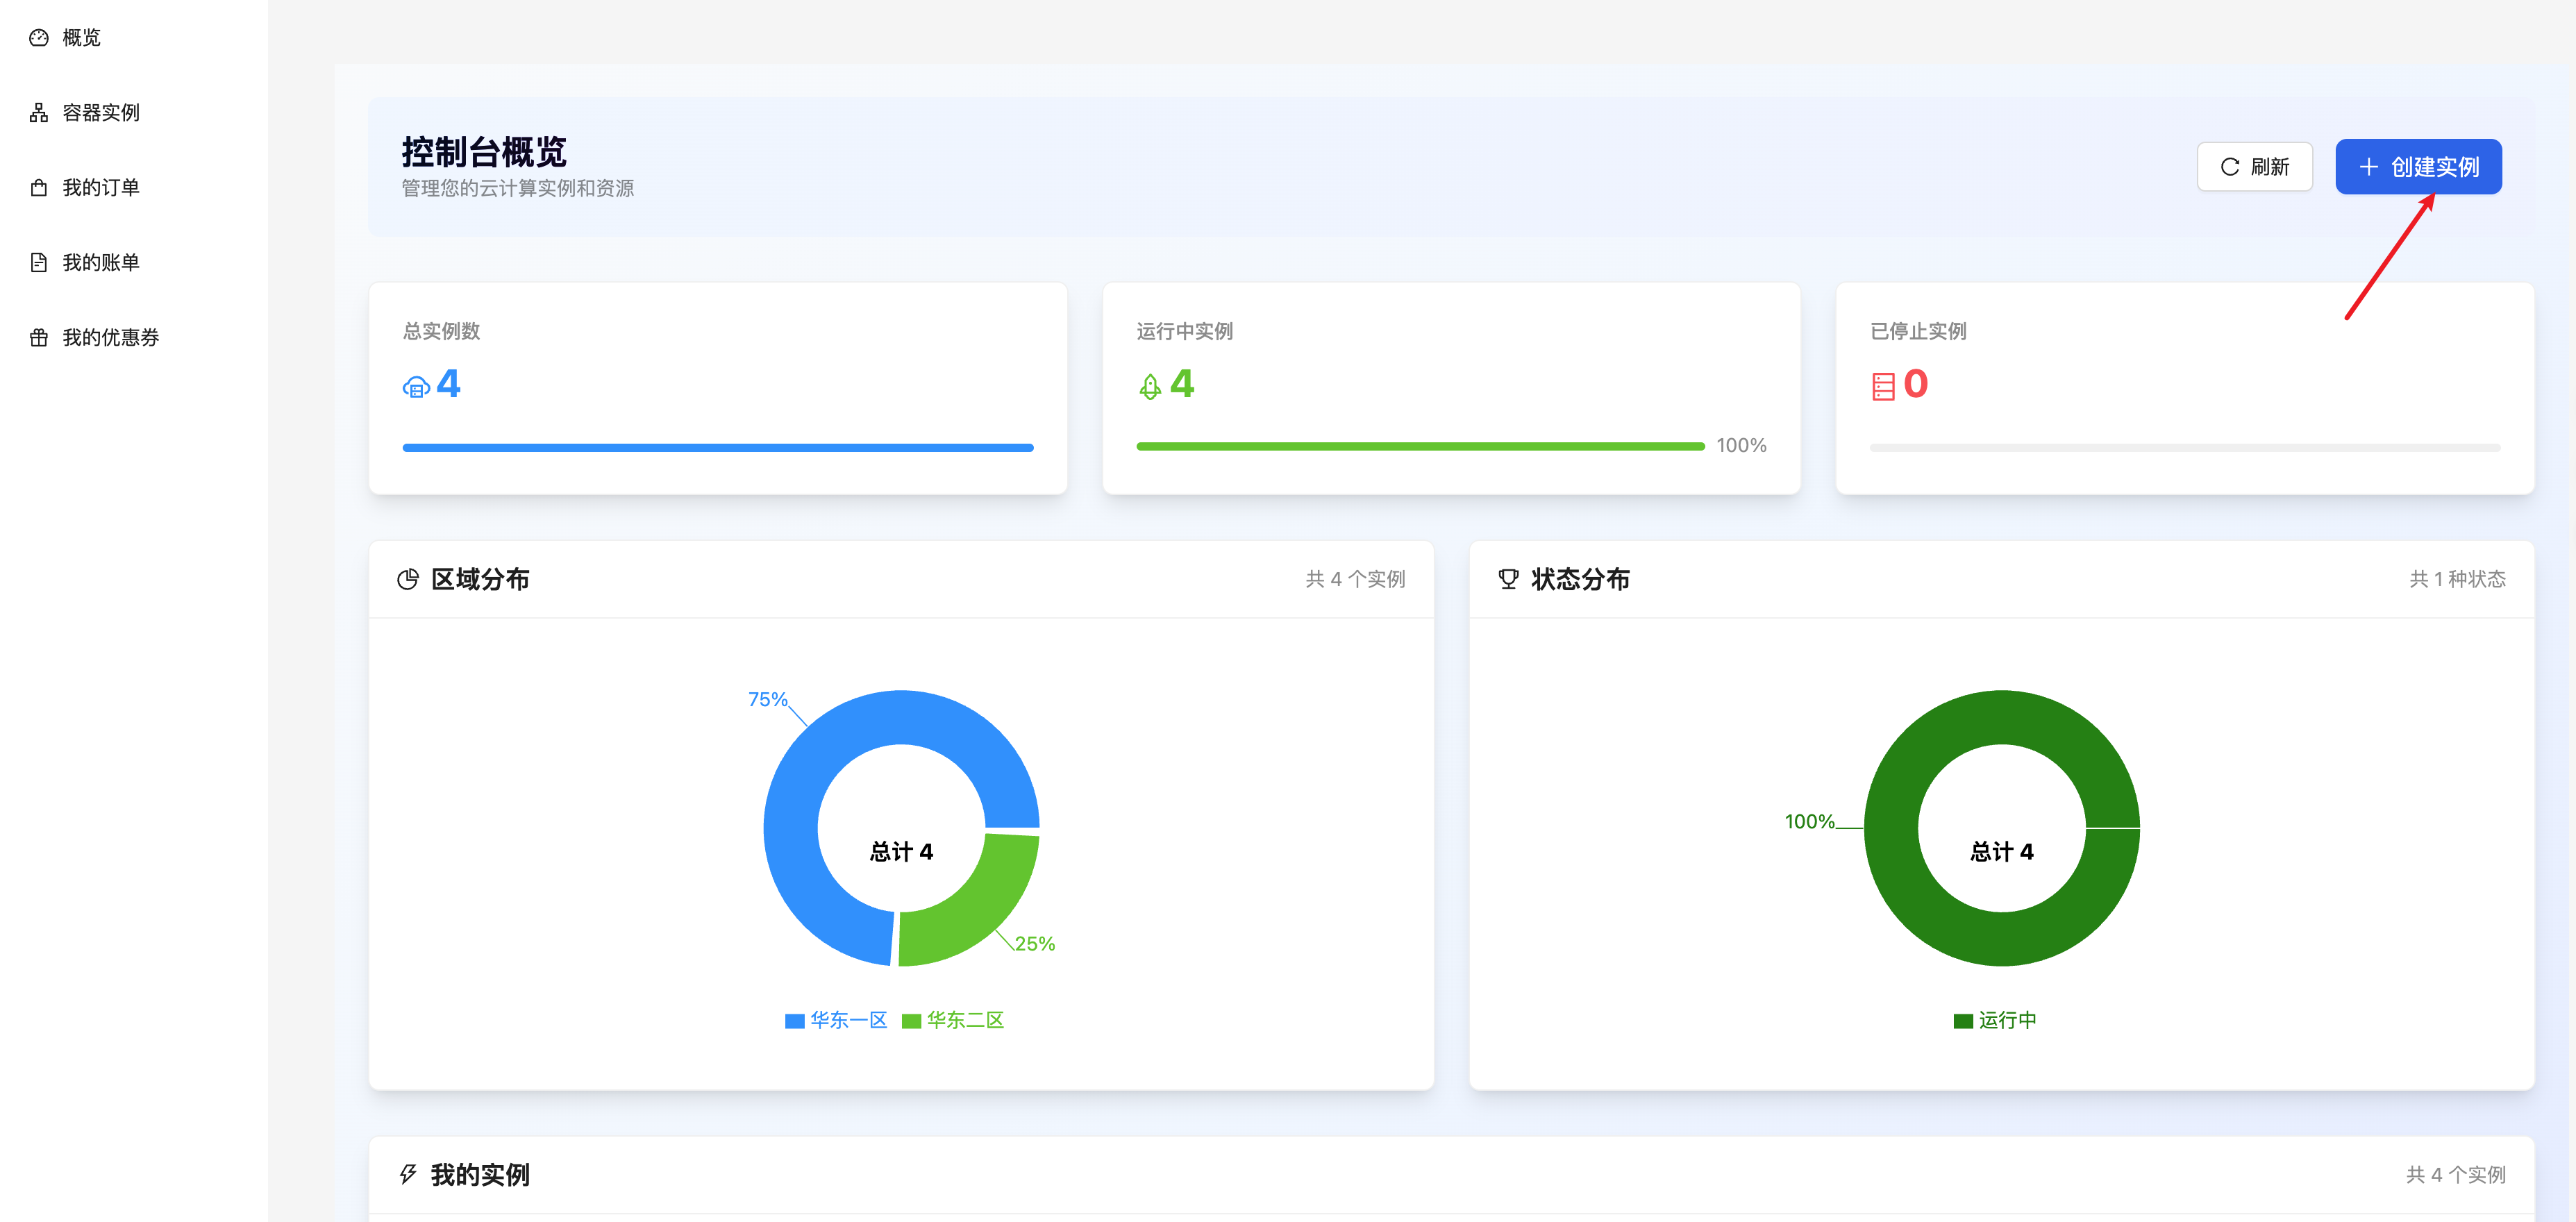
Create an Instance
After registration, enter the console and click "Create Instance" under My Console Overview.
On the instance rental page: select billing method, region, GPU model, GPU quantity, then choose the appropriate available host and image (built-in base images and community images with different deep learning frameworks). Finally, click to create.
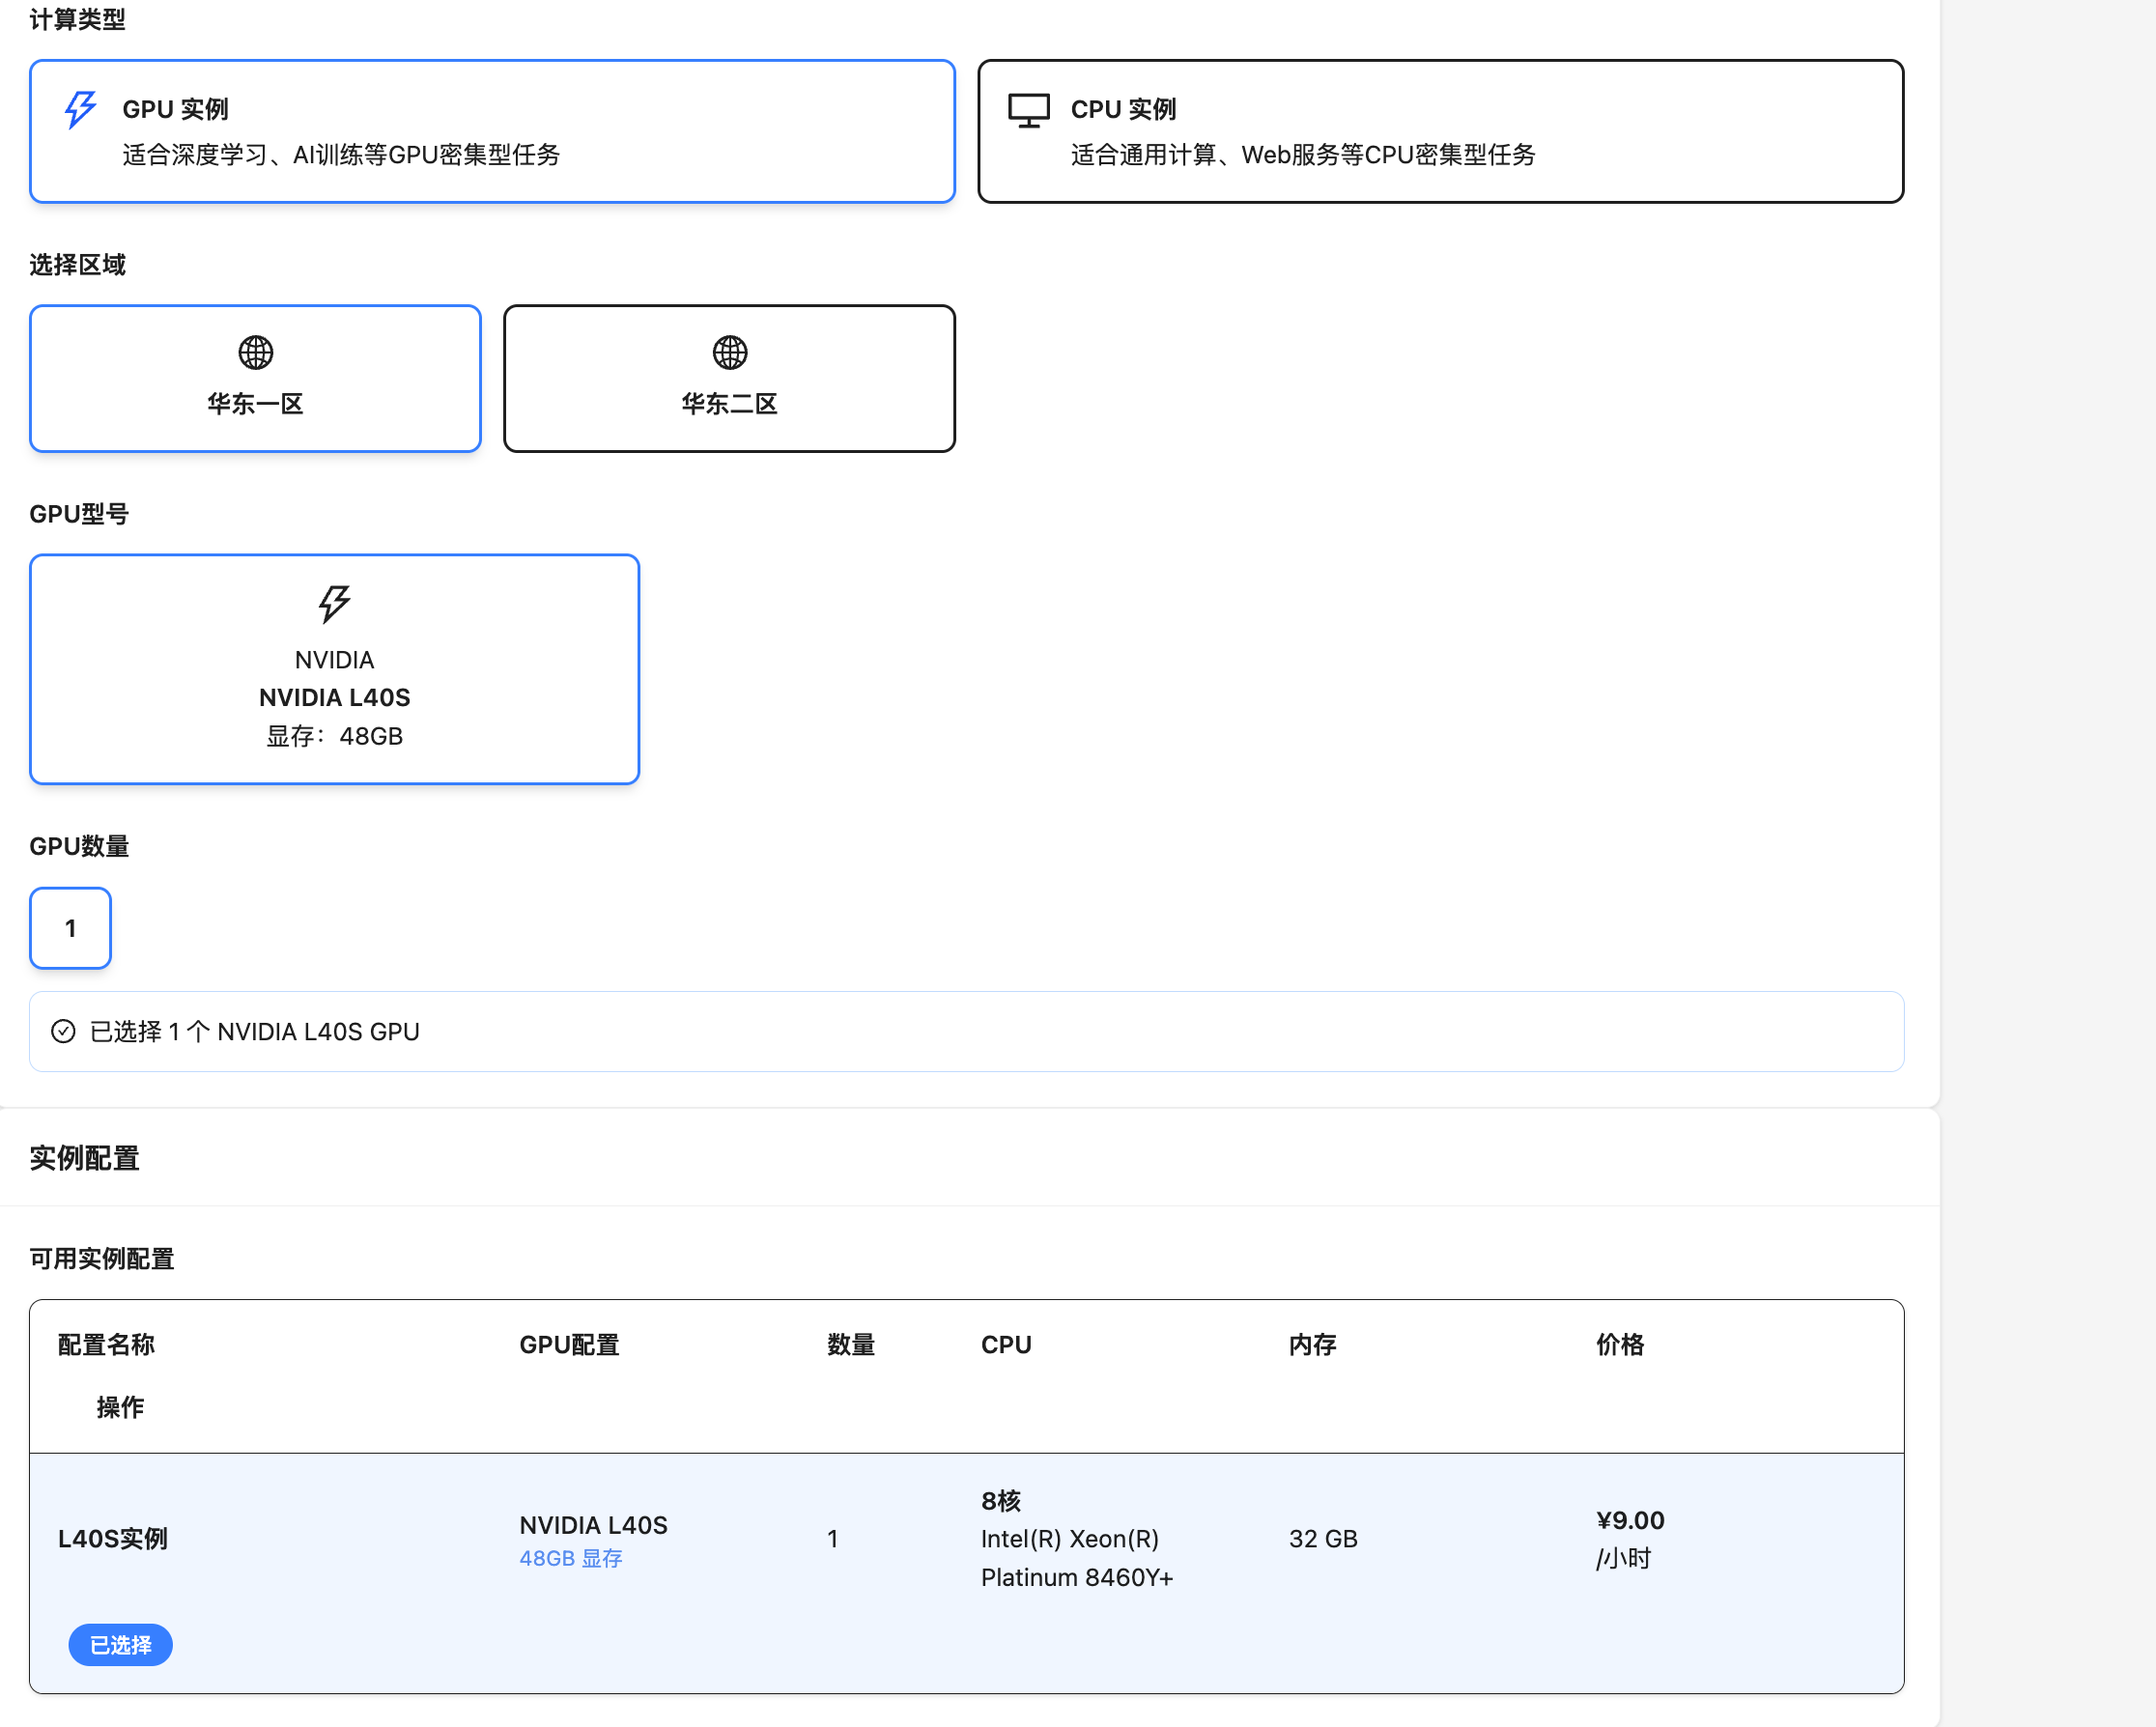
Configuration Options:
- GPU Specification: Choose the GPU that fits your project (e.g., RTX 4090, A100, etc.)
- Instance Configuration: CPU, memory, storage space
- Image Environment: Images pre-installed with deep learning frameworks
- Billing Method: Pay-per-second or monthly/daily packages
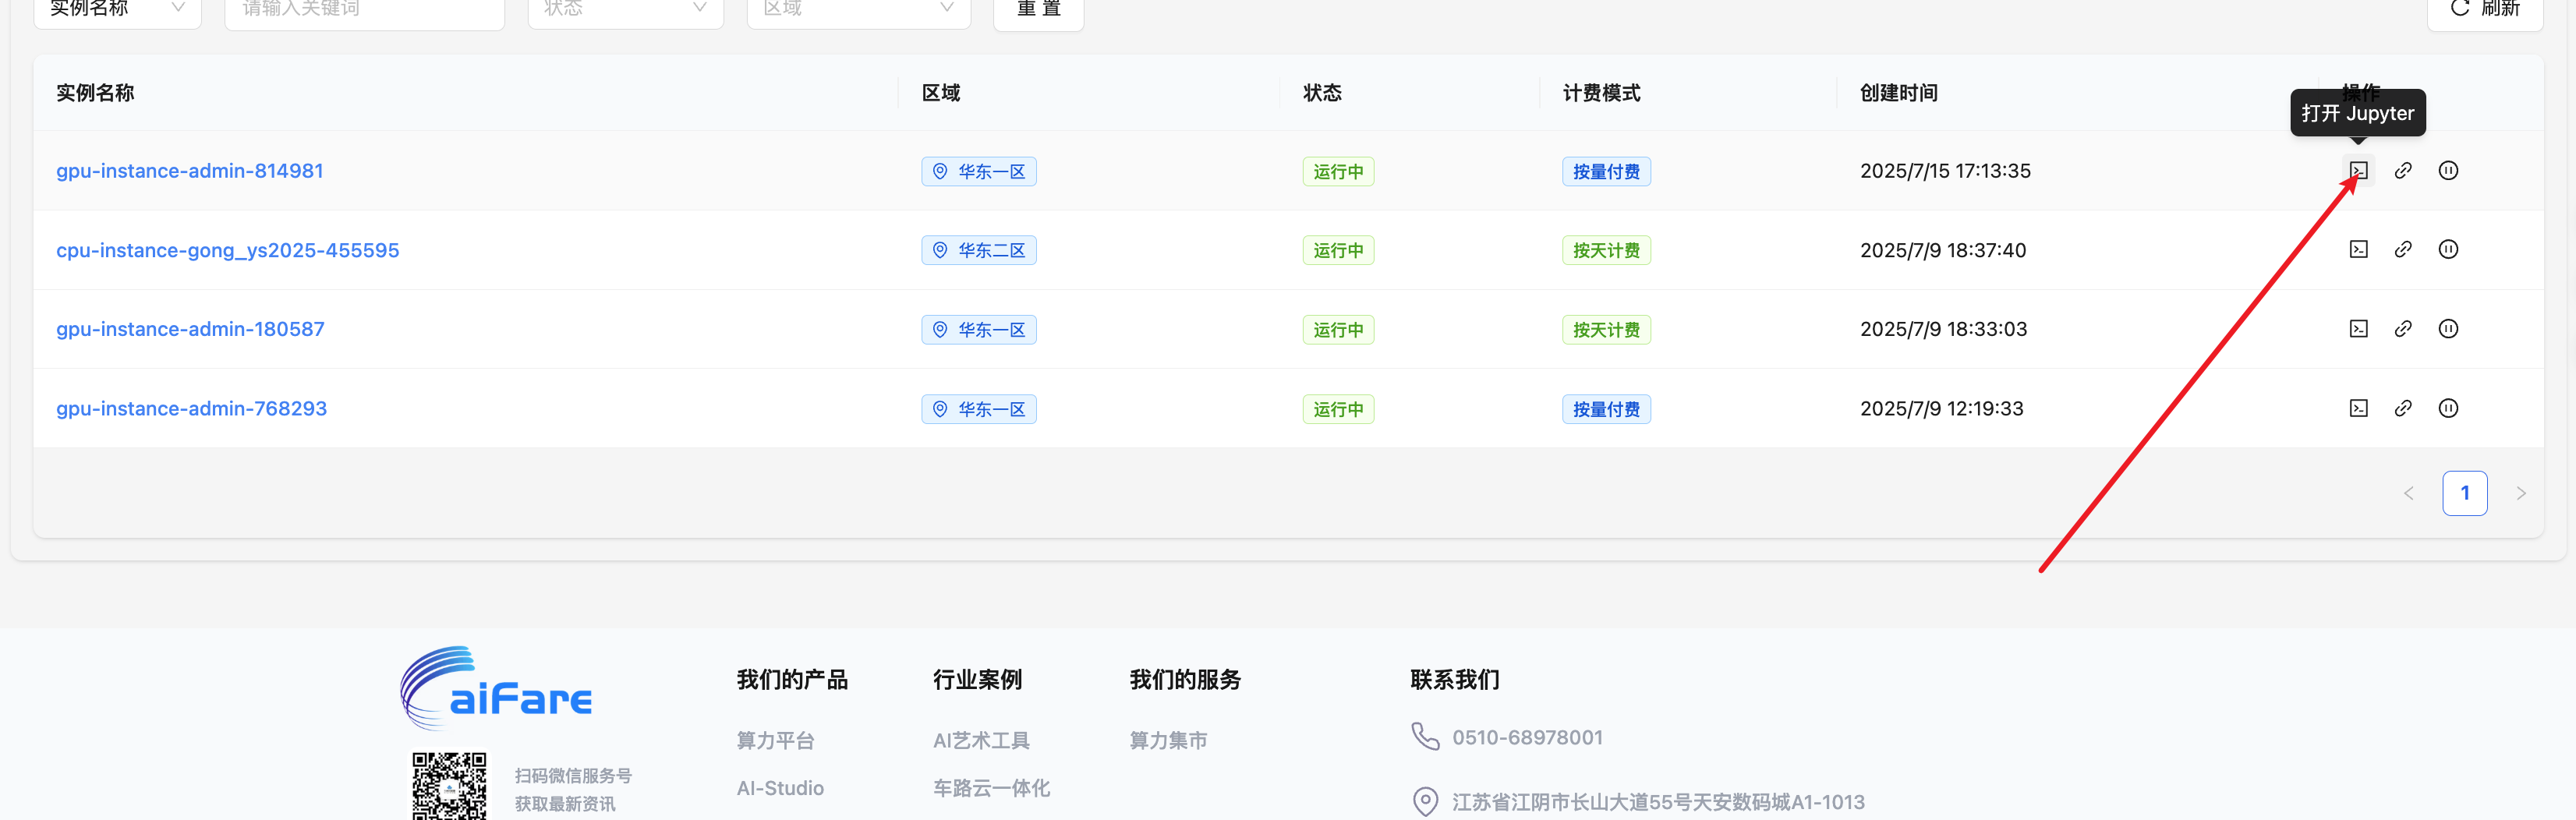
Instance Management
After creation, you can view and manage your instances in the instance list:
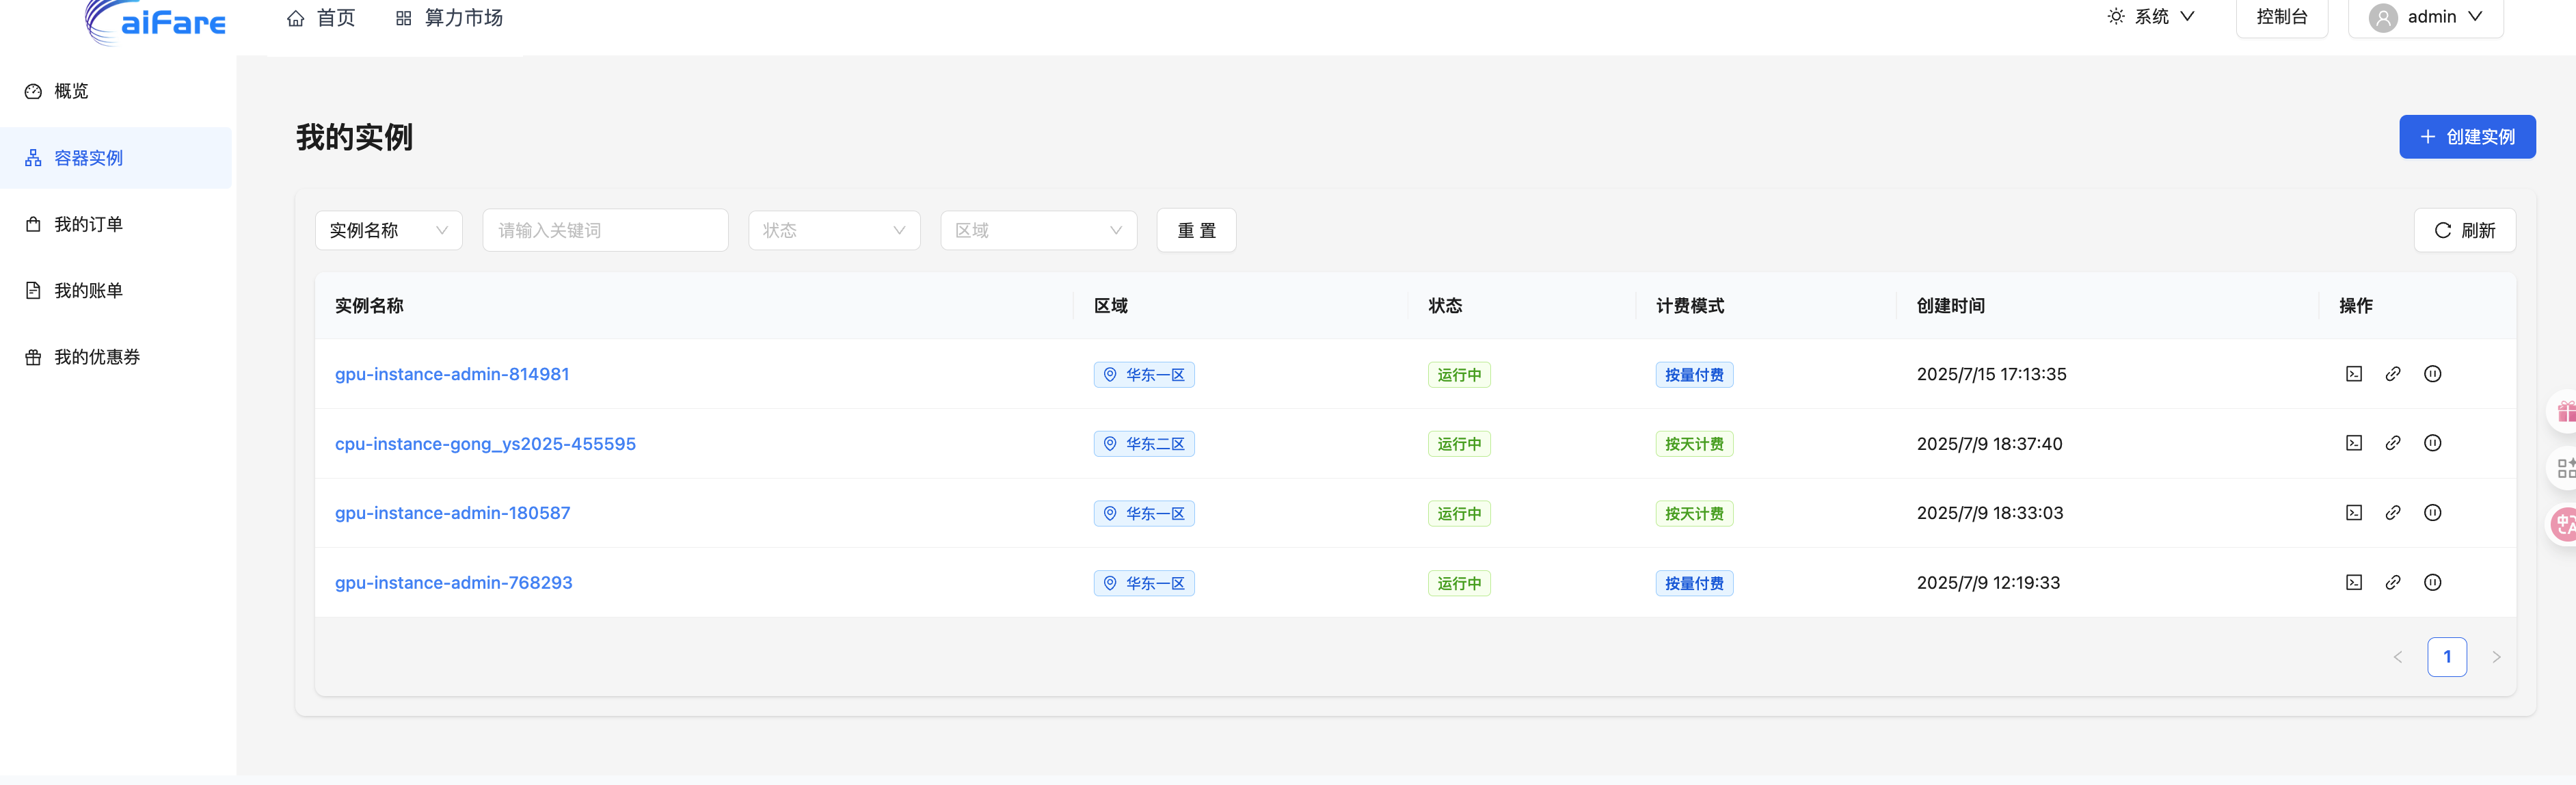
Instance Information:
- Instance Name: Unique identifier
- Region: e.g., East China 1
- Status: Running, Stopped, etc.
- Billing Mode: Pay-as-you-go, daily payment, etc.
Operations:
- JupyterLab: Online development environment
- SSH Access: Connect to the instance via SSH
- Stop Instance: Shut down the current instance
Instance Details
Click the instance name to enter the details page, where you can view detailed information and perform management operations:
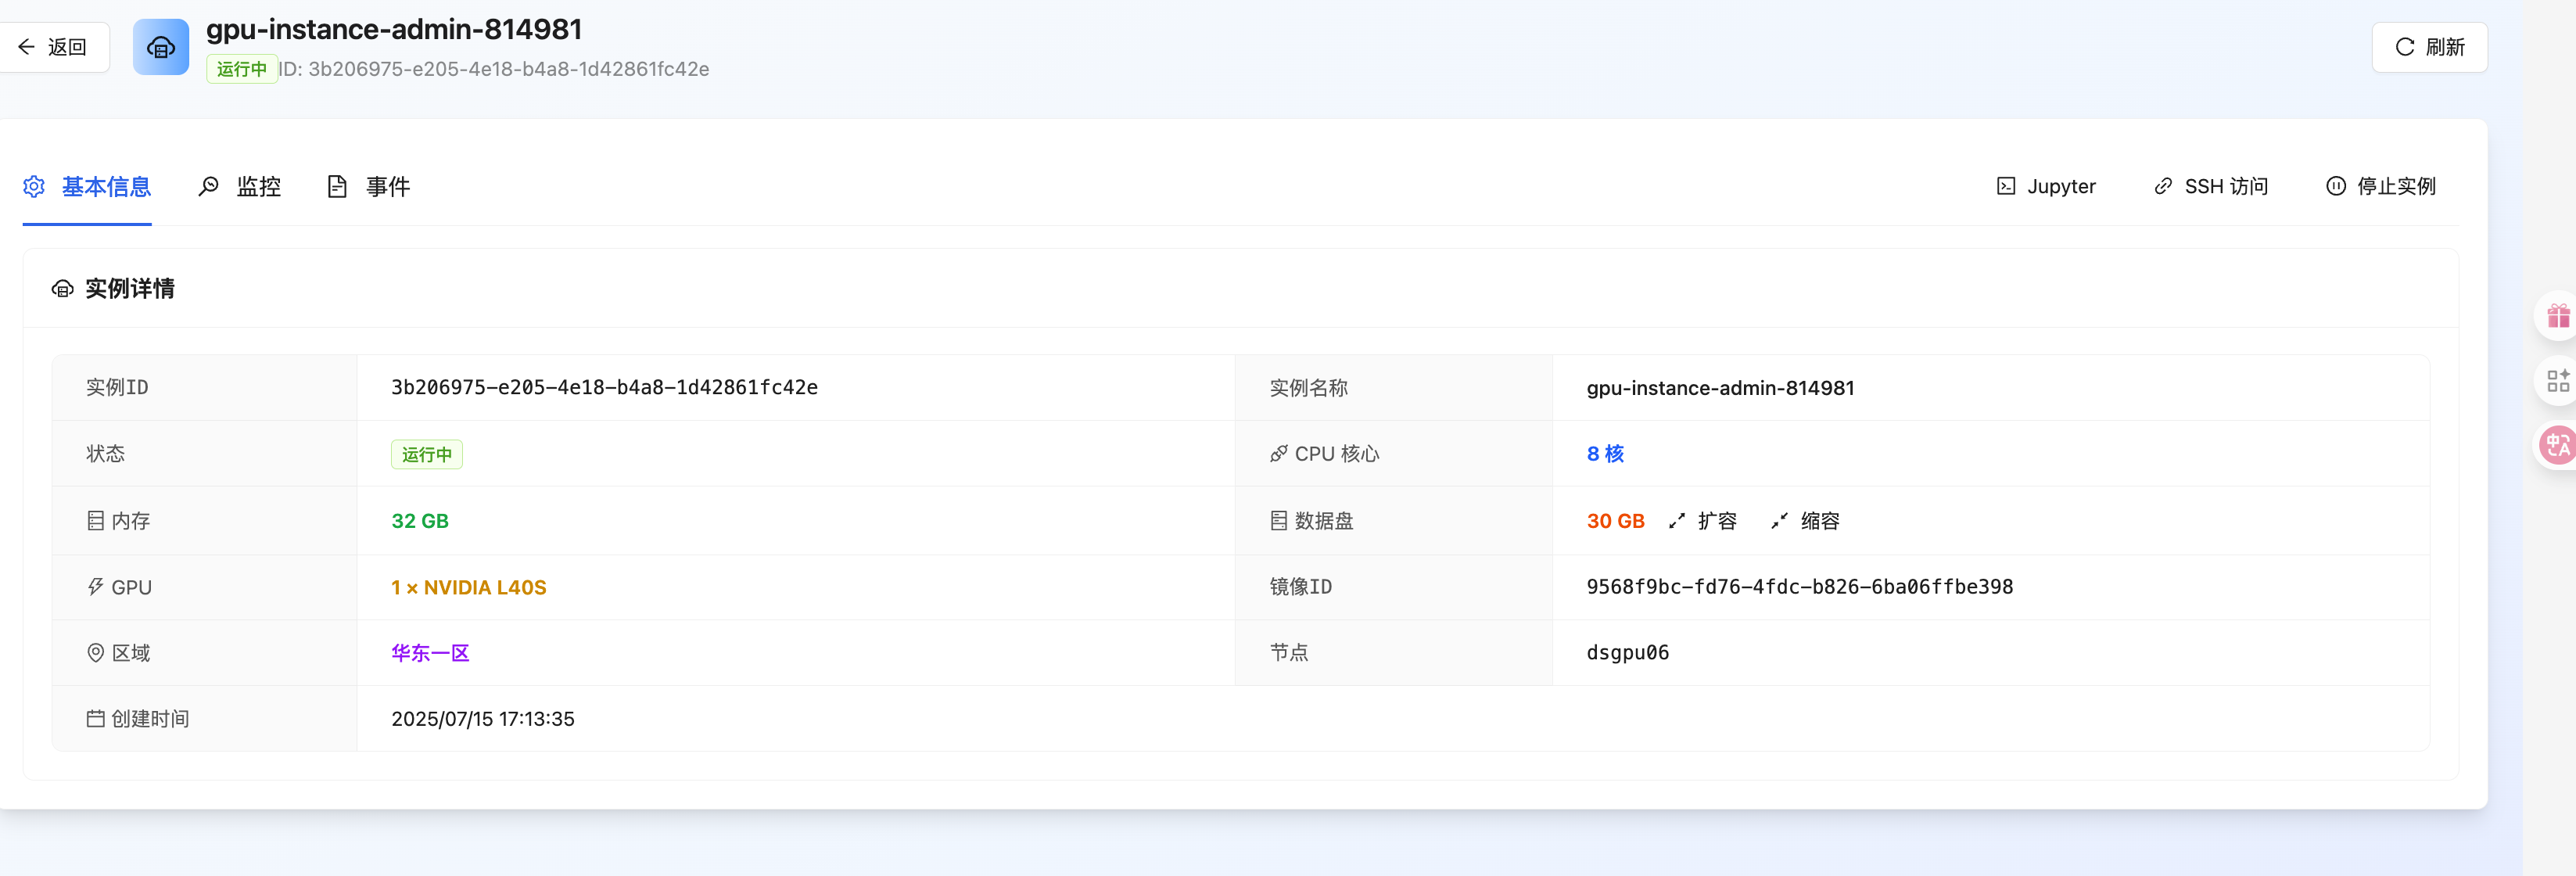
Basic Information:
- Instance ID: Unique identifier
- Instance Name: User-defined instance name
- Status: Running, Stopped, etc.
- Creation Time: The specific time the instance was created
Resource Configuration:
- CPU Cores: Number of allocated CPU cores
- Memory: Allocated memory size
- GPU: GPU model and quantity (e.g., NVIDIA L40S x 1)
- Data Disk: Storage size, supports expansion and reduction
Network Information:
- Region: Geographical region of the instance
- Node: Specific server node
- Image ID: System image identifier used
Quick Actions:
- Jupyter: Launch JupyterLab development environment
- SSH Access: Connect to the instance via SSH
- Stop Instance: Shut down the current instance
- Refresh: Update instance status information
Operation Options:
- Shutdown/Restart
- Change Image
- Save Image
- Expand Data Disk
- Release Instance
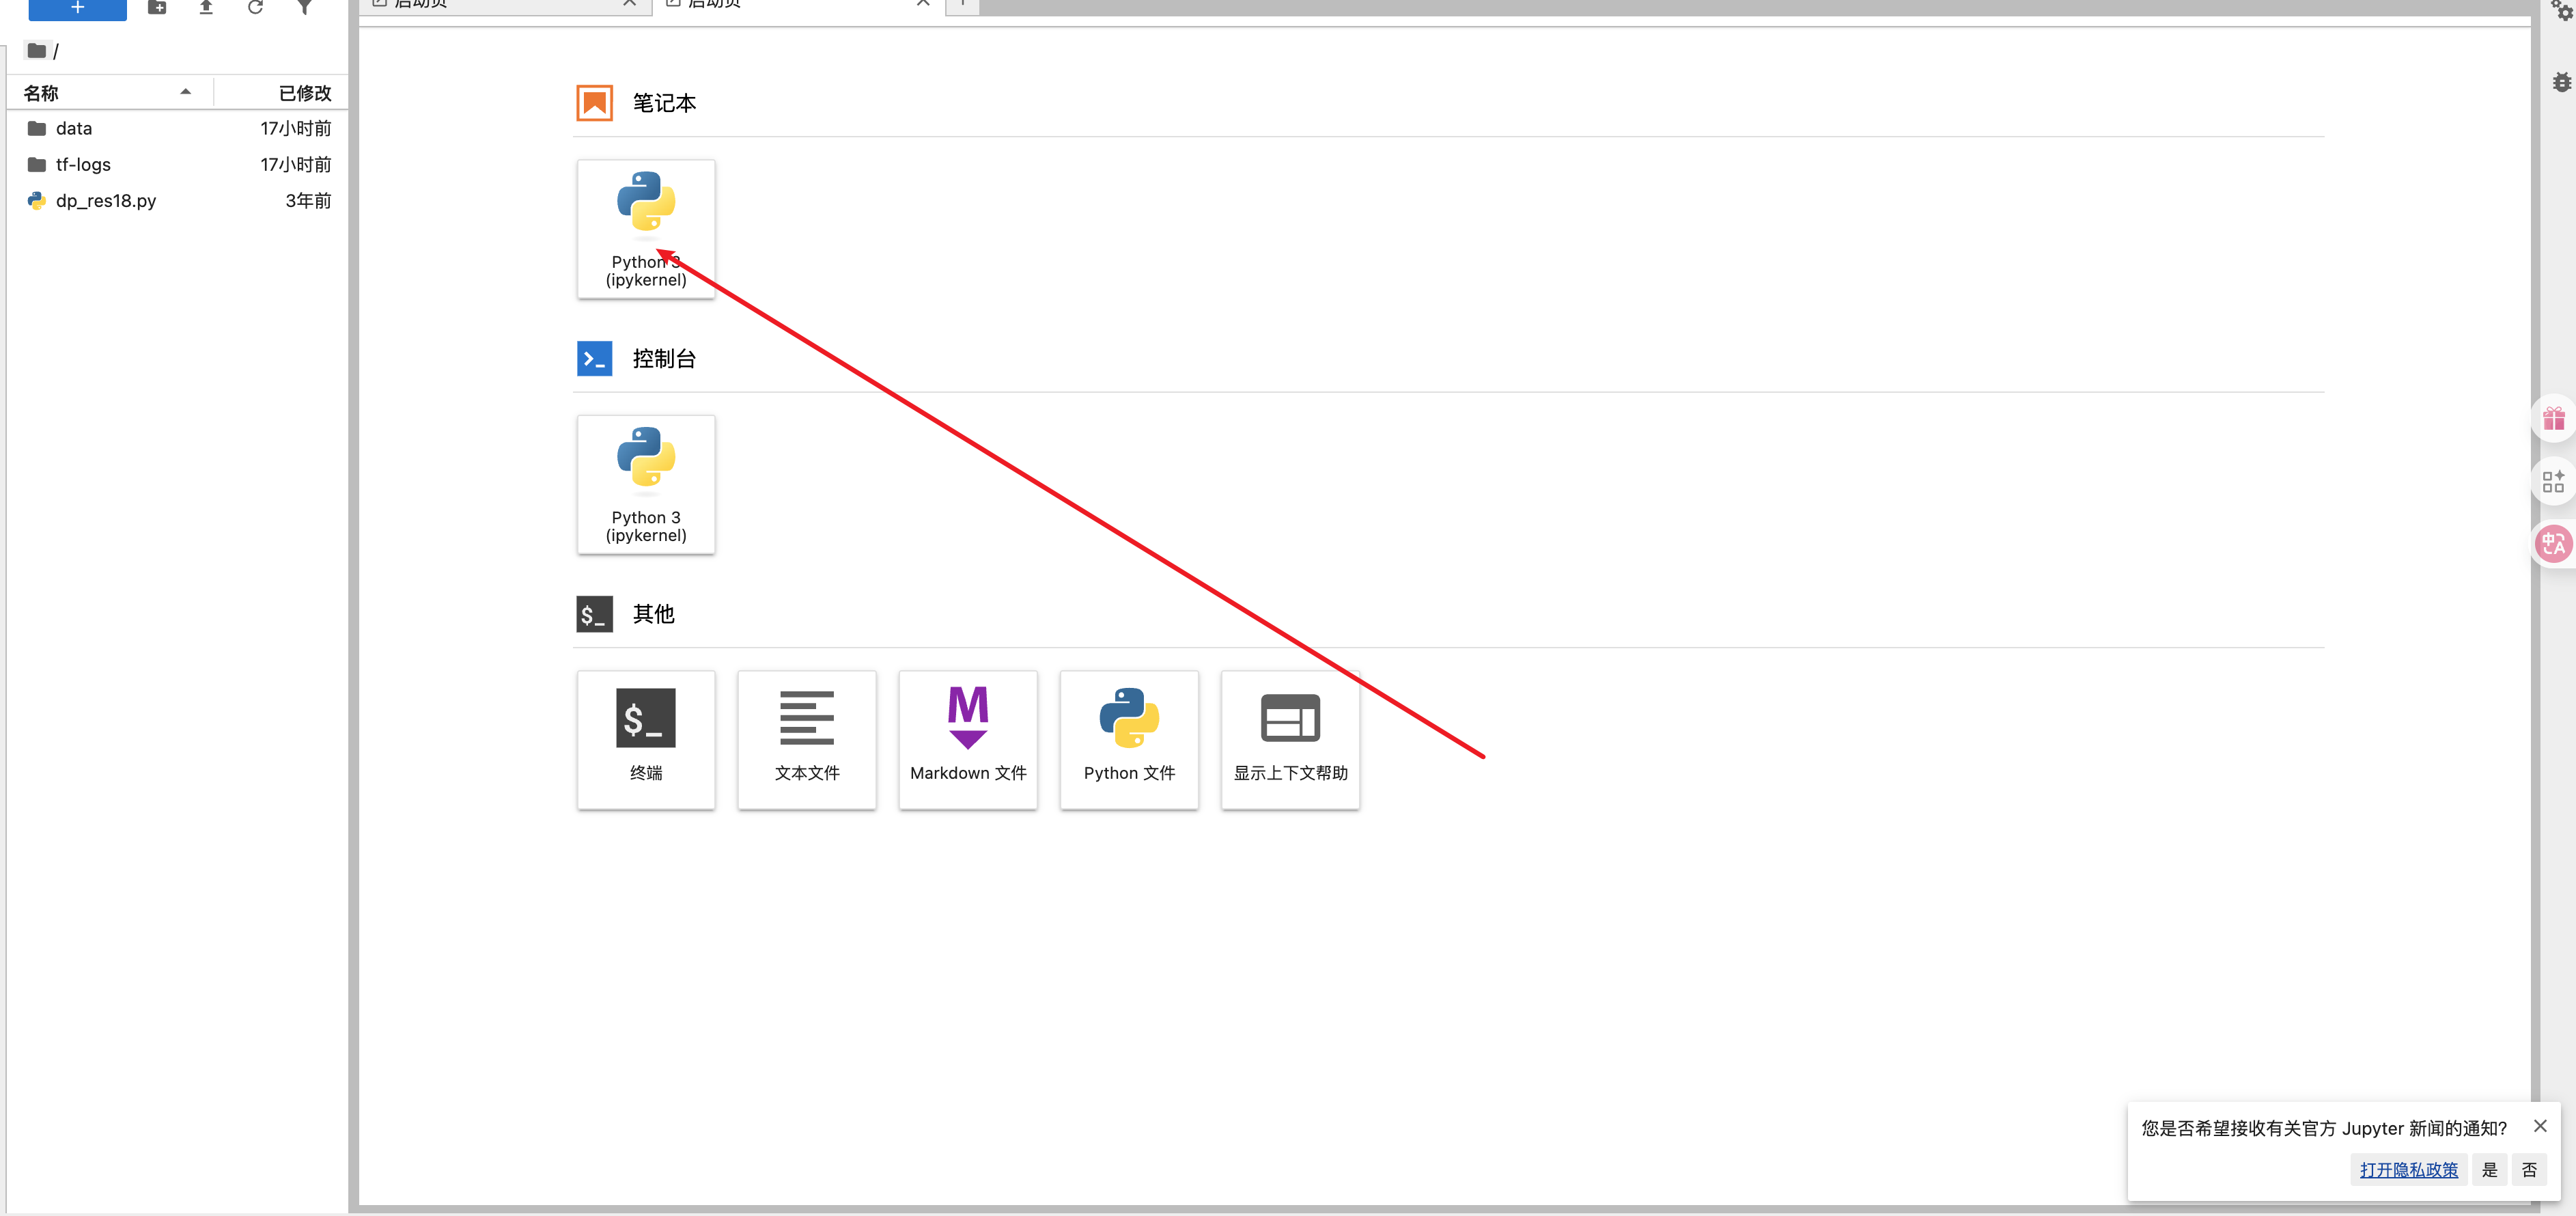
Start Developing
Click the "JupyterLab" quick tool in the instance list to launch the online development environment.
The development environment includes:
- Notebook: Jupyter Notebook support
- Console: Python interactive environment
- File Browser: Manage project files
- Terminal: Command line operations
Create Your First Project:
- New Notebook: Select Python 3 kernel
- Import Data: Use uploaded files
- Install Dependencies: Use pip or conda to install required packages
- Start Coding: Write your AI model
Common Operations:
- Create, edit, and delete files
- Upload and download data
- Manage project structure
- Code completion and syntax highlighting
- Real-time error checking
- Version control integration
Upload Data
After the instance is running, you can enter the "Upload Data" interface to manage your project files.
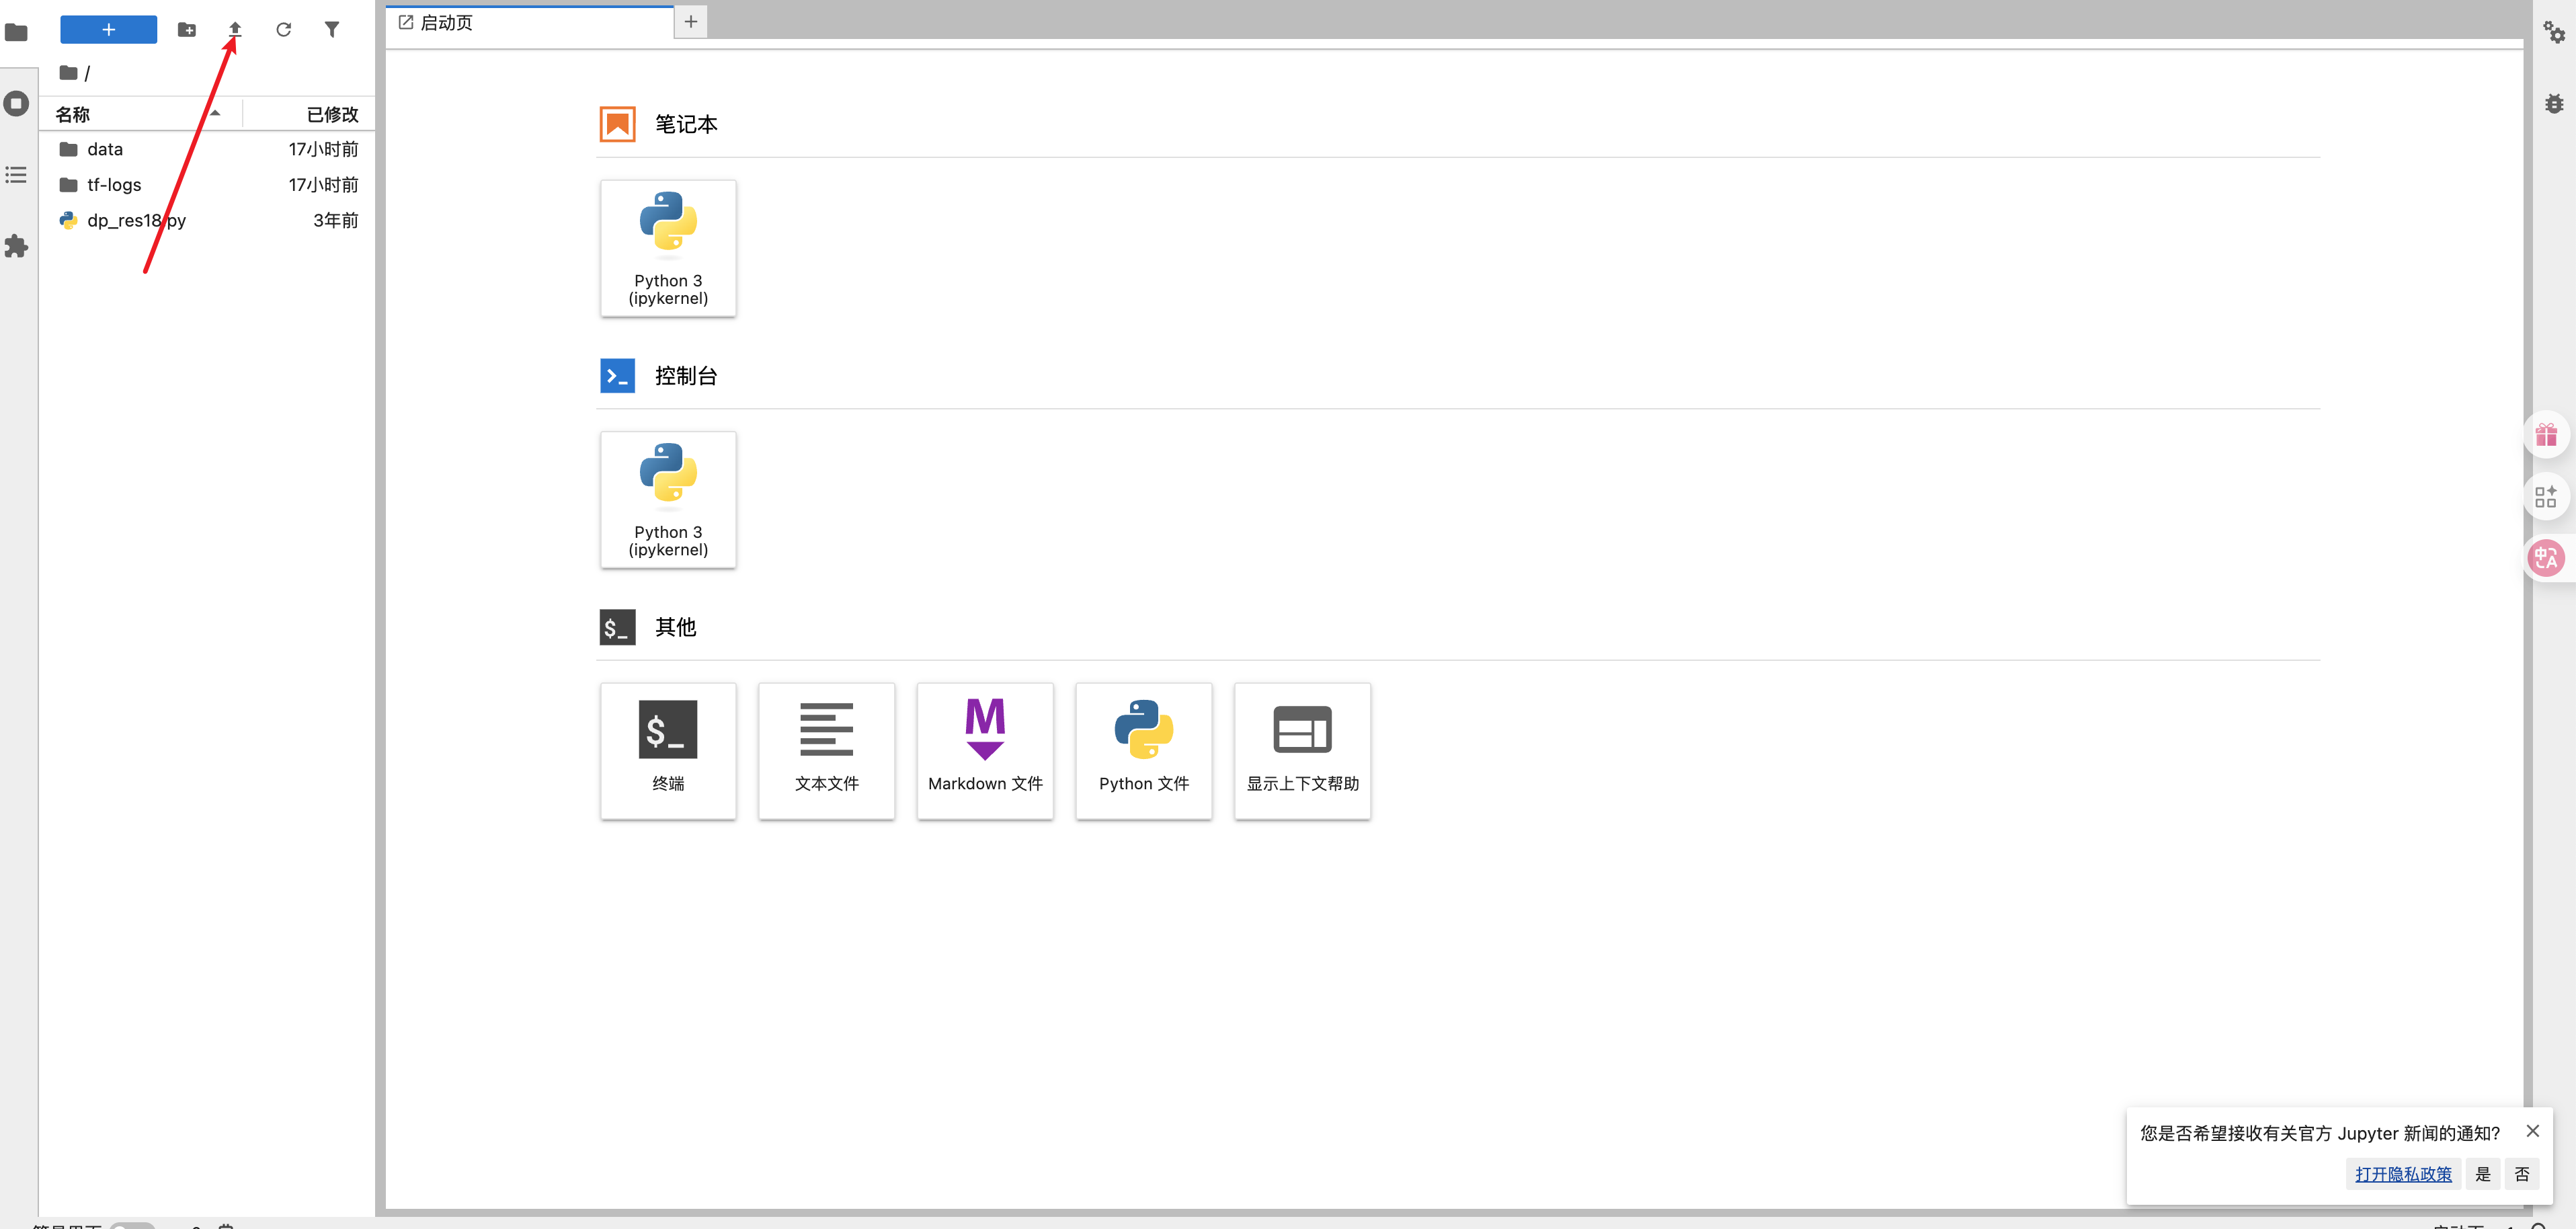
File Operation Toolbar:
- New Folder: Create directory structure
- New File: Create code files
- Upload File: Upload local files to the cloud
- Download File: Download files to local
- Refresh: Update file list
Next Steps
- How to Choose a GPU - Select the right GPU configuration
- Billing Guide - Learn detailed billing rules
- JupyterLab Usage - Deep dive into the development environment
- Data Management - Efficiently manage project data